
Congratulations, friend! You’re the new proud owner of your very own Organic Mushroom Farm!
If this is your first time growing mushrooms, which for me it definitely was, you’re in for quite a treat. It’s amazing how quick these delicious fungi grow, and I want you to feel 100% prepared and supported in your mushroom-growing-journey.
To make the experience easier for you and for all of posterity, I documented my first go at growing a Back to the Roots Mushroom Growing Kit. Check back with this guide as you grow, to corroborate your suspicions and boost your confidence!
Let’s start from the very beginning. I’ve heard someone say that’s a very good place to start (cough, cough Julie Andrews).
Here is a Step-by-Step Guide on How to Grow Your Own Organic Mushrooms:
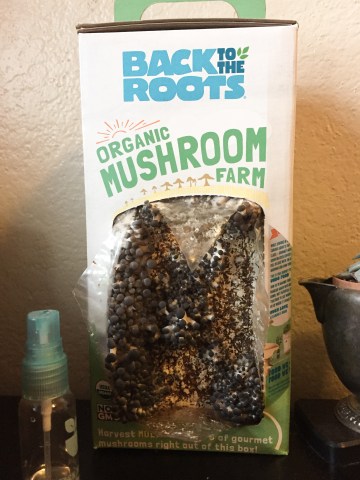
Stage #0: Acquire Mushroom Growing Substrate
After I picked out my new Mushroom Growing Kit, I went home and got my room clean enough to not be embarrassed while taking these pictures. Then, I chose my mushroom farming spot.
The Spot: I chose my Mushroom Farm spot: on a table next to my west-facing window. This is where I keep most of my plants, so little Shroomie made some fast friends.


Stage #1: Prep Your Mushroom Growing Substrate
Next, I examined the side panel that contained brief instructions on how to grow the Mushroom Farm. There was also a card on the inside with instructions on it, as well as a mini spray bottle (super duper cute).

So both sets of instructions tell you to remove the front panel of the box before taking the bag out, but I’m a rebel, so I didn’t listen. I also think it’s easier to punch out when the bag is not inside.

Then the instructions prompt you to cut an “X” into the front of the bag. To do this, I took a pair of scissors and held them open carefully, using one edge to cut the shape of an“X” into the plastic on top of the dirt brick. DO NOT cut the the flaps off! These are very important in helping the soil maintain moisture by creating a humid, greenhouse-like effect.

Next, I lifted the flaps that I just made by cutting the “X” and scratched the surface of the dirt with a fork. You could really use anything to do this scratching: stick, spoon, or magic wand. The key is to scratch with a good amount of force, but not so much that it seems like you’re cutting into the brick. Just thoroughly scrape the white stuff so it looks less white and a little looser and less dense.

![]()
![]()
![]()
This step is key in stimulating mushroom growth, so it’s important not to forget this one!
Stage #2: Soak the Mushroom Growing Substrate
Soaking is important in hydrating the soil and giving it enough of a moisture boost to feed your mushrooms.
After scratching, I got a big bucket of water ready. I don’t know why I expected to need a multi gallon heavy duty bucket for this part, but really any bowl wide enough for your mushroom bag to lie face down in is big enough. Fill the bowl or bucket with water. Set the bucket up in a place that is out of the way because it will need to soak for 6-10 hours. I decided to let it soak overnight.
Once your water bucket is set up, place the mushroom bag inside with the “X” face down. It will likely float a bit lopsidedly on top of the water. Just make sure the side with the “X” is submerged. I put an empty heavy-duty Tupperware on top of the mushroom bag just to be safe, but this is by no means necessary.
Do not fret if some of the soil falls out while it’s soaking. This is totally normal.
Stage #3: Water and Grow the Mushrooms
The following morning (or 6-10 hours later) I inserted the mushroom bag back into the box and returned it to the spot I had picked out near the window with indirect light.

The instructions said to place the side with the “X” face up, but I glossed over that so it just stood straight up. Immediately after setting the Mushroom Farm box in its spot, I filled the spray bottle with water from the tap. I gently lifted the flaps of the mushroom kit and sprayed 4-5 pumps onto the soil area.
I did this pretty much every time I remembered I was growing mushrooms in my room, which was about 3 times per day.
I repeated the spraying process daily for the next 8 days until I noticed baby mushrooms sprouting up. This is called “pinning” and it typically takes 1-2 weeks for this to occur.

Once the mushrooms started growing, the instructions advised me to stop watering. However, since my room tends to be really dry, I continued spraying about once per day. This is recommended if it looks like your mushrooms are beginning to dry out.
Then I pretty much just sat back and relaxed for the next week while my mushrooms went from little sprouts to full grown. The mushrooms grow so fast from this point!

Day 1 since pinning…
Day 2

Day 3

Day 4

Day 5

Stage #4: Harvest Your Mushroom Crop!
The box says that the mushrooms will double in size everyday, and that is absolutely true. By the time 5 days rolled around from pinning, the mushrooms had stopped growing and had reached about 1-2 inches in size.

I harvested all of the mushrooms at that point by gently plucking them out of the growing medium. I washed off the specks of soil that were attached to the base of the mushrooms and set some out to dry for later.
With the rest of the mushrooms, I made one of my guilty pleasure foods. It’s actually heaven on earth. I crave it more than bacon. Seriously.
I heated up a cast iron skillet on medium flame and threw in a pad of unsalted butter. Then, I separated all the mushrooms into individual caps and placed them into the pan with the butter. Sautéeing the mushrooms in the skillet for about 5-7 minutes, the mushrooms will begin to turn dark golden brown on some of the flatter parts. Next, I sprinkled the mushrooms with a pinch of salt and then dug in. I know it sounds rather plain and simple, but this preparation is absolutely delicious. There are countless amazing ways to use the homegrown Pearl Oyster Mushrooms form your Mushroom Farm, but this is just my tried and true favorite for a simple breakfast.
I hope this Mushroom Farm progress guide has helped you gain confidence in your mushroom growing abilities. If you have any questions throughout your journey, reference this guide to see what I did. But know that there are many ways to do this right. You totally got this so get growing!
Don’t hesitate to shoot us an email at contact@backtotheroots.com or visit the FAQ section on our website for any questions that arise.
Do you have any tips that have helped you in your mushroom growing? Share them with us in the comments below!